
How to Add Subtitles to YouTube Videos (And What Actually Helps SEO)
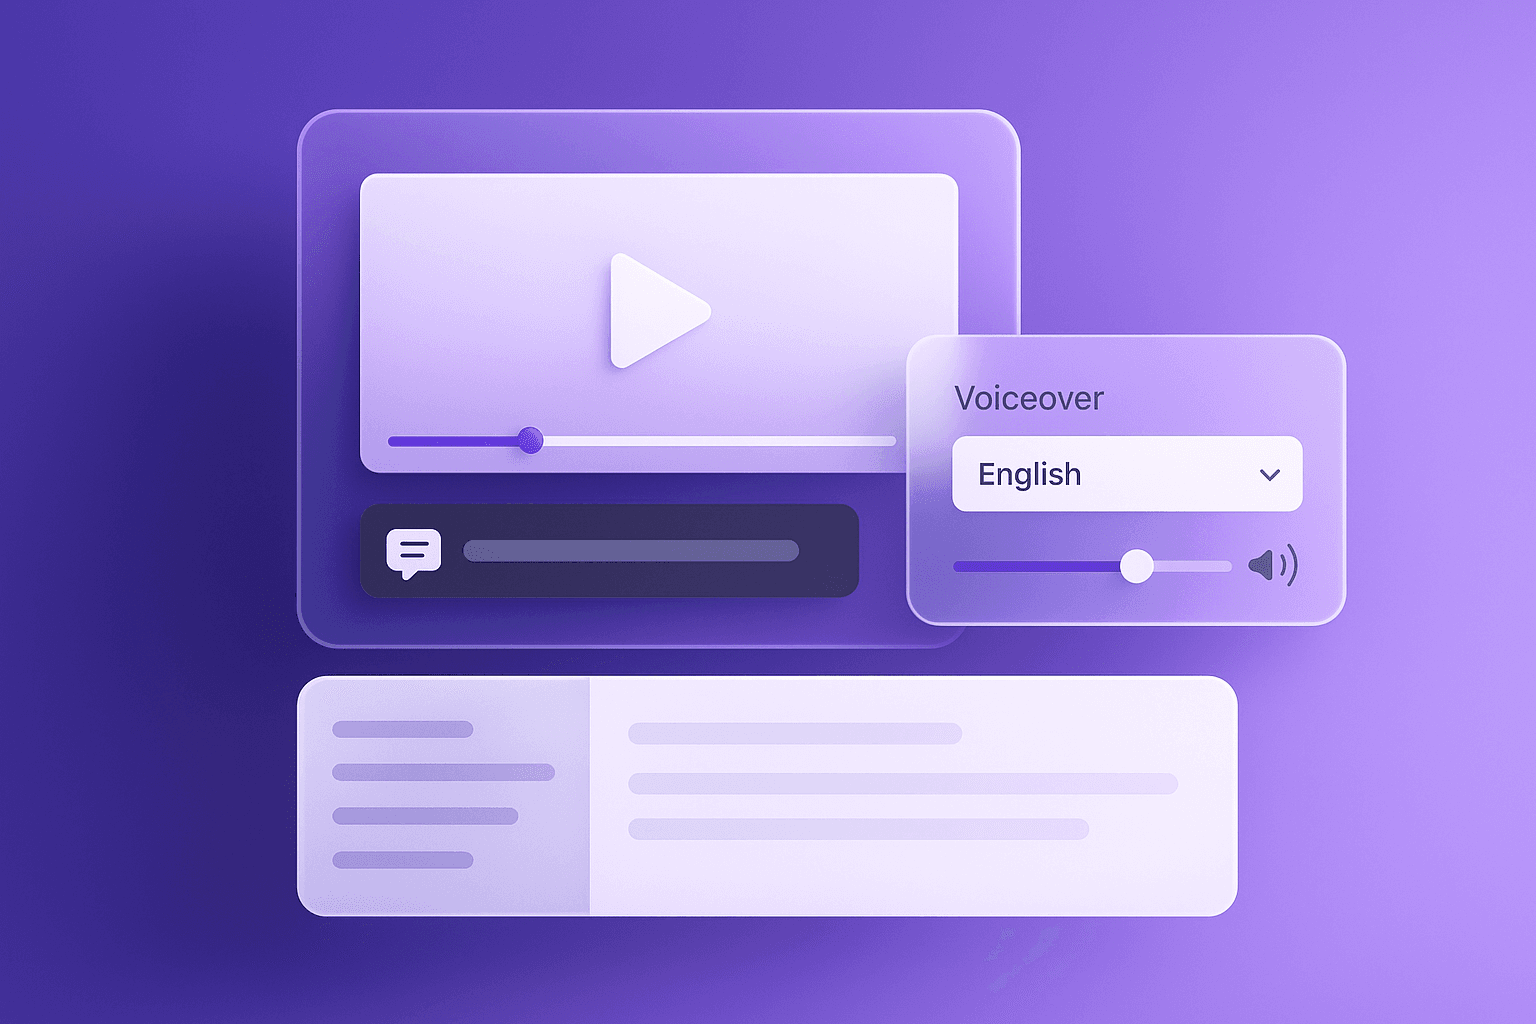
Subtitles are one of the highest-ROI fixes you can make on a YouTube video—especially if your content is even slightly instructional. This guide shows how to add subtitles to youtube the right way (not just “turn on auto-captions”), and what subtitle decisions tend to help discoverability and viewer retention.
Answer in 30 seconds
- If you want the fastest decent baseline: publish with YouTube auto-captions, then edit them for names, product terms, and punctuation.
- If you care about accuracy (training, demos, support): upload your own subtitle file (SRT/VTT) instead of relying on auto.
- Keep subtitles readable: 1–2 lines, short chunks, correct timing, and consistent casing for UI labels.
- Treat subtitles like product copy: fix the first 60–90 seconds first (where viewers decide to stay).
What is subtitles vs captions?
Subtitles are on-screen text meant to translate or transcribe spoken dialogue for viewers who can hear the audio. Captions typically include non-speech audio cues (e.g., “[music]”, “[door closes]”) and are designed for accessibility.
On YouTube, people use the terms interchangeably. Practically: if you’re making educational or product content, aim for accurate text + good timing—and add audio cues when your audience benefits from them.
title: Need clean subtitles without babysitting the timeline?
description: If you’re doing this weekly, the bottleneck is usually editing—not generating. Start with a draft you can quickly review, then ship.
ctaText: Create subtitles from a video
ectaLink: /ai-subtitles-generator
Step-by-step process
1) Decide your approach (auto vs upload)
Pick based on how much accuracy you need:
- Low stakes / casual content: YouTube auto-captions + quick edits.
- Product demos / onboarding / compliance: Upload your own subtitles (SRT/VTT) so wording matches what’s on screen.
- Multiple languages: Create separate subtitle tracks per language (don’t cram translations into one track).
If you’re starting from scratch, a dedicated subtitle draft tool can be faster than editing inside YouTube. (If you want a no-cost option to start, see Vidocu’s free subtitle creator.)
2) Create or export a subtitle file (SRT or VTT)
YouTube commonly accepts:
- .srt (simple, widely supported)
- .vtt (WebVTT; also common)
Minimum quality bar before you upload:
- Correct speaker words (especially brand/product terms)
- Sentence-level punctuation
- Reasonable line breaks (don’t let YouTube wrap awkwardly)
3) Upload subtitles in YouTube Studio
- Open YouTube Studio.
- Go to Content → select your video.
- In the left menu, open Subtitles.
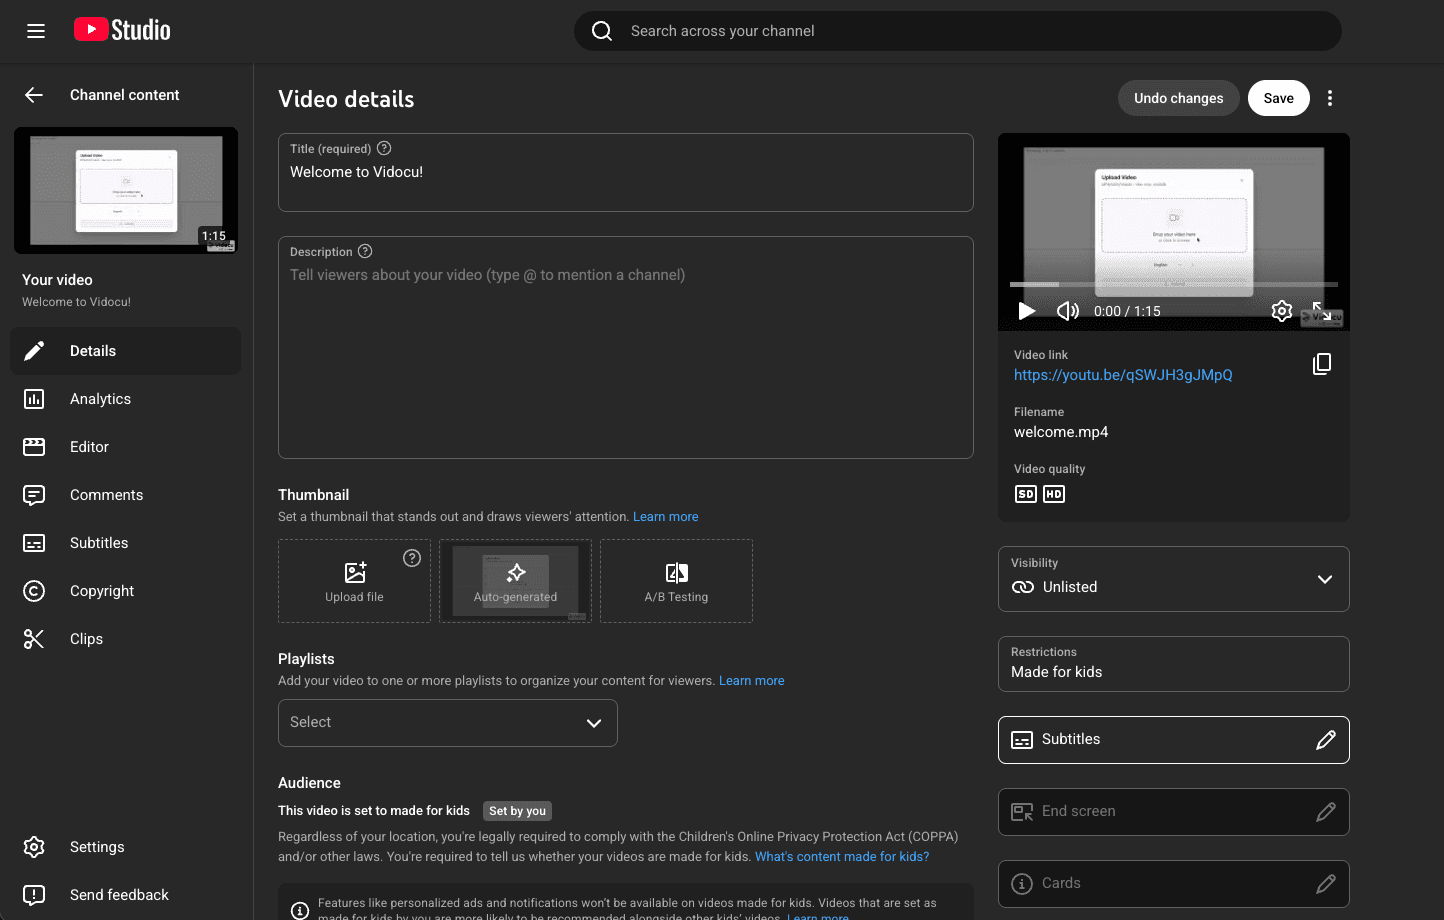
- Choose the language track.
- Click Add (or Upload file).
- Select With timing if your SRT/VTT includes timestamps.
- Upload and save.
Tip: If you already published the video, you can still add or replace subtitle tracks later without re-uploading the video.
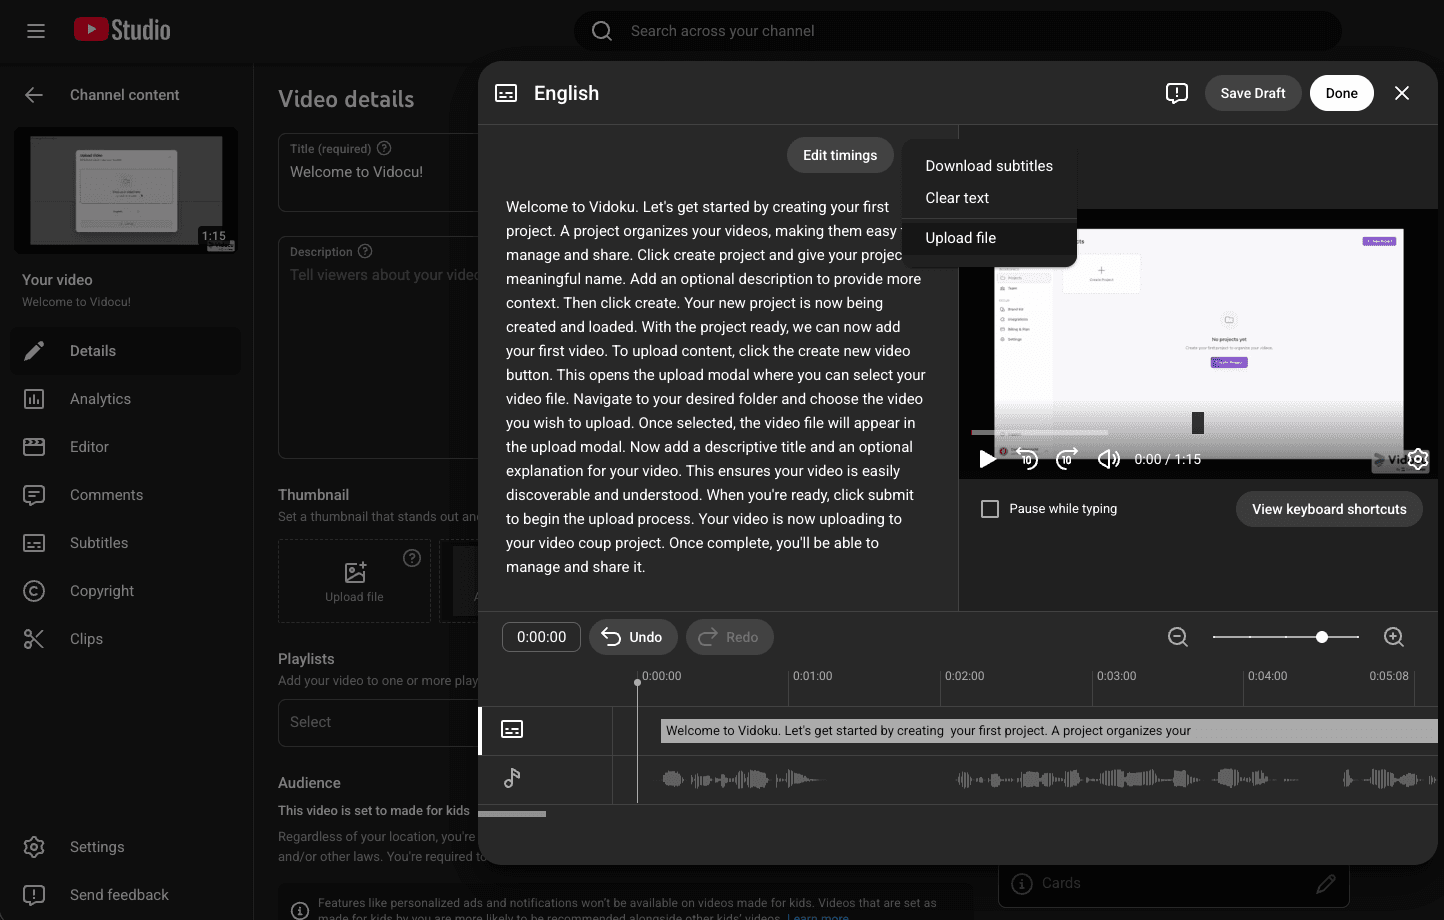
4) If you used auto-captions, edit them (don’t “set and forget”)
Auto-captions are a draft. The edits that matter most:
- Proper nouns: product names, people, company names
- UI labels: “Settings”, “Billing”, “Workspace”, etc.
- Numbers: “two” vs “2”, version numbers, dates
- Punctuation: it changes meaning and readability
Start by fixing the first minute. That’s where misunderstandings cause the fastest drop-offs.
5) Check timing and readability
Even perfectly spelled subtitles can be painful if they’re mistimed.
- Subtitles should appear as the words are spoken, not a second late.
- Keep to 1–2 lines when possible.
- Break on natural phrases (not mid-button-name).
6) Publish, then spot-check on real devices
Do a quick playback check:
- Desktop (normal speed)
- Mobile (small screen)
- One “busy audio” scenario (laptop speakers, noise nearby)
If you create a lot of training content, this is also where a repeatable post-video workflow helps—turning one recording into both subtitles and a written article/SOP can reduce rework. (Example workflow: video to documentation.)
Real example
A support lead records a 7-minute tutorial: “How to reset SSO for a locked-out user.”
- Goal: Reduce tickets by making the video searchable and easy to follow without sound.
- Tooling approach: Generate a subtitle draft, then manually correct product terms (“SAML”, “IdP”, exact settings names).
- Outcome: Upload accurate subtitles (SRT) to YouTube, then reuse the same text as the base for a help article and internal SOP.
The key move isn’t fancy editing—it’s consistency: the words in the subtitles match the words on-screen and in the help center.
Template
YouTube subtitle publish mini-template (copy/paste)
- Video title finalized (matches the problem the viewer has)
- Description includes:
- 1–2 sentence summary
- Key steps or timestamps
- Link to the written guide (if you have one)
- Subtitles:
- Language track(s) set
- Uploaded SRT/VTT or edited auto-captions
- Names/product terms verified
- Final checks:
- First 60–90 seconds reviewed with subtitles on
- Mobile playback checked
- Any “you can’t read that” moments fixed
Checklist
Subtitle QA checklist (fast but effective)
- Product/brand terms spelled consistently (no variations across the video)
- Button/menu labels match the UI exactly
- Numbers are unambiguous (2 vs two; dates; times)
- No “wall of text” moments (break long sentences)
- Timing feels natural (not late; not rushing)
- Acronyms are correct (SSO, SAML, API, etc.)
- No accidental profanity / wrong-word substitutions (common in auto-captions)
Tools
Here are realistic options, depending on your workflow and how often you publish:
- YouTube auto-captions (built-in): Best starting point for casual videos. Tradeoff: you’ll spend time correcting terms and timing, and accuracy varies.
- Subtitle draft + editing workflow: Faster for teams shipping regularly because you start with a structured draft you can review. Vidocu’s AI subtitles generator is one way to do that.
- Free utilities for creators: If budget is the constraint, start with Vidocu’s free tools and keep your process lightweight.
If your real goal is “subtitles plus a written how-to,” look for tools that don’t trap your work in one format—because the subtitles often become the backbone of your article.
FAQ
Do subtitles help YouTube SEO?
They can help indirectly. Subtitles improve comprehension (especially on mute, in noisy places, or for non-native speakers), which can improve retention signals. They also make your spoken content more legible to systems that parse text.
Are YouTube auto-captions good enough?
Sometimes. For conversational content they can be fine, but product demos and training usually need manual fixes for terms, names, and UI labels.
Should I upload SRT or VTT?
Either works for most cases. SRT is simplest and widely supported. VTT can be useful if your workflow already uses WebVTT.
Do I need captions for accessibility?
If you serve a broad audience (or work in regulated environments), captions with non-speech cues can be worth it. At minimum, accurate dialogue text is a big step up from none.
Can I add multiple subtitle languages to one YouTube video?
Yes—add separate language tracks in the Subtitles section. That’s usually better than burning translations into the video.
Related Vidocu workflows
If you’re already recording videos, these workflows help you reuse the same source material instead of redoing work later:
- Start from the homepage to see the overall workflow: Vidocu
- Turn a recording into a written guide: video to documentation
- Generate a step-by-step internal procedure: video to SOP
- Create subtitles from a single upload: AI subtitles generator
- Build consistent internal docs from videos: AI video documentation
- Convert trainings into searchable articles: webinar to knowledge base
- Try a lightweight option first: free subtitle creator
- Explore utilities for creators and teams: free tools
title: If you publish tutorials, reuse the subtitles as the doc draft
description: The fastest path to “good documentation” is often: record once, clean up the wording once, then reuse it in multiple formats.
ctaText: Turn a video into a help article
ectaLink: /video-to-documentation
Turn one video into an SOP in minutes
If you already recorded the walkthrough, Vidocu can turn it into a clean, step-by-step SOP (with the wording aligned to what you actually said). Start from your next recording and build the process from there via video to SOP.

Written by
Daniel SternlichtDaniel Sternlicht is a tech entrepreneur and product builder focused on creating scalable web products. He is the Founder & CEO of Common Ninja, home to Widgets+, Embeddable, Brackets, and Vidocu - products that help businesses engage users, collect data, and build interactive web experiences across platforms.